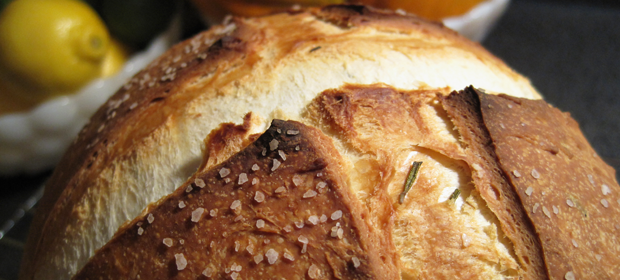
Over the holidays we were gifted some pretty amazing things. There are two new special tools I am specifically referring to right now, a KitchenAid! and a Calphalon Dutch Oven!!! Oh my! Could it get any better?! The year has already started off much much better than last, I couldn’t be happier. Both Joe and I are employed with jobs we like and we’re in good health (crowd cheers) plus, we’re set up to bake anything and everything we want. I’m ready to make 2010 a great year full of fresh bread & happiness. Cheers to all and thanks for taking a moment to look at my little site, a project that I desire to keep growing into something beautiful. And thank You (M&D and B&R) for gifting tools that will help us grow (up & out;) as well.
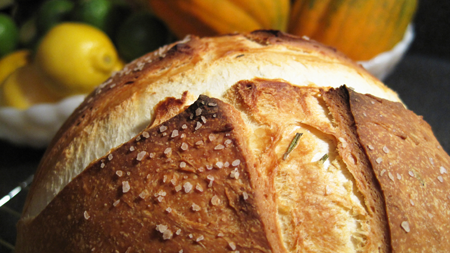
Of course we had to break into our new toys immediately to take them for a spin. First stop — rosemary bread. We combed the internet for the recipe we would bake first. We landed on a recipe from ThePioneerWoman.com.
This recipe was adapted from
ThePioneerWoman.com
Rosemary Bread
20 oz. of bread flour (all purpose is okay, too) – about 4 cups.
8 oz. of water (or 1 cup).
4 oz. melted butter with chopped herbs of choice (we used rosemary).
2 teaspoons salt.
1 teaspoon active or instant yeast (if active, it would be best to sprinkle yeast over the water to let it start to work before mixing it in).
In your KitchenAid stand mixer (with dough hook) sprinkle yeast over the water before mixing in the rest of the ingredients. Mix together on low speed for about 10 minutes or so until you can achieve a windowpane with the dough- this is something I never knew about until I followed their instructions. Achieving a windowpane is when you can pull off a small chunk of the dough you’re kneading and stretch it gently to see if it is somewhat translucent. If you can do this without it tearing, it’s ready.
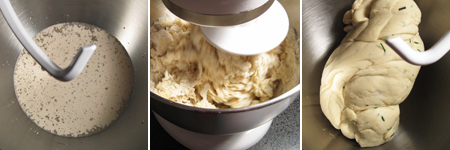
Once this elasticity has been achieved, allow the dough sit out with plastic wrap over it for 1-4 hours to double in size. After it’s gotten bigger, it should be kneaded for a minute or two so that the yeast can redistribute – Once we kneaded the bread, the dough seemed to return to its original size and become more dense.
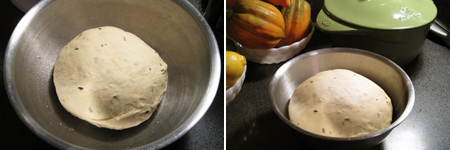
Preheat oven to 450 degrees.
Cut a large ‘X’ into the surface of the bread dough so it can bloom!
Bake inside a covered cast iron pan after coating the rounded dough with olive oil and sprinkling with kosher salt. Bake for 30 minutes with the lid on, then remove lid to finish it off for another 15 to 30 minutes.
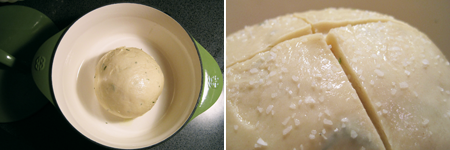
The bread can get brown on the bottom if it’s too close to the heating element; if that happens, just slice it off with a sharp knife.
We baked ours for the 30 minutes covered and an additional 20 without the lid- next time we’ll do the additional 30 minutes because our dough was a little too moist although it was still very delicious. Our outer crust was beautifully perfect, this was an excellent first experience with both our KitchenAid and cooking with the dutch oven. We can’t stop thinking about mixing up our next batch of bread!
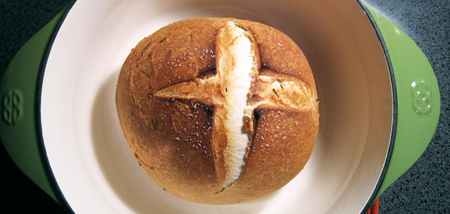 It’s exciting to think about how much easier the bread making process will be, the possibilities just opened up. Looking forward to finding more recipes to try.
Check out my Easy Dutch Oven Bread!


Bread Lover Mommy says
Oh dear, I think I just found another wonderful site to bookmark in my recipe folder. There are simply not enough days in the years to bake bread! Thank you for fuelling my obsession, and glad I could find a kindred spirit in your blog! ;)
Kerri @ The Calphalon Place says
Hi, just doing some browsing for my Calphalon site. Truly more information than you can imagine on the web. Looking for something else, but great site. Have a nice day.